The headliners, that is, the interior roof linings of Thinks have been know to sag. I am thrillingly close to having a retrofit designed to fix this defect properly. Some of my previous attempts at reinforcing the headliner failed in precisely the same was as they did without the reinforcement. Once I verify that my new design is reliable, my boss and I will decide how much it will cost to do the retrofit and publish that cost. I’ll also publish the design and instructions for doing the retrofit yourself if you are so inclined or you can try to get someone else to do it for you. This post will be the first and last parts of the instructions: removing and re-installing the headliner.
First, the headliner is white and your hands are going to get dirty on several occasions throughout this process. So unless you want brown and gray smudges all over your nice upholstery you will end up washing your hands or replacing your gloves frequently. I’ve tried using a adhesive-backed clear plastic protective film over the upholstery, but it was too difficult to get applied and there are already so many steps that need to be done before it can be applied all the way to the edges– I didn’t have much success with it, but maybe another product would work.
Next, I want to explain the terminology for the pillars, just in case it’s new to any readers. The pillars support the roof and they are identified in alphabetic order from front to back. So the A-pillars are on either side of the windshield. The B-pillars are just aft of the doors. The C-pillars are on either side of the rear hatch/lift-gate.
The order that the steps are performed in is not particularly important.
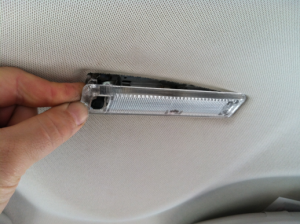
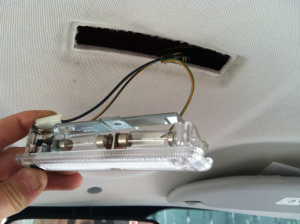
Remove the dome light by pressing the left side end (with the switch) toward the right, and rotate the left end down. There is a spring on the right side of the dome light that holds it in place. Remove the three wires carefully; the metal spade connectors that are part of the dome light assembly bend easily, and if you happen to use a screwdriver or similar tool to push the connectors off, there is the possibility of shorting power to ground and blowing fuse 41.
Pull the weatherstrip loose from the top halves of both doors (or completely if you prefer), and remove the rear hatch weatherstrip completely. Please take care to not get the gray, sticky, insufferable putty-like substance (that is often found around the bottom of the rear hatch weatherstrip especially) on your hands or clothes. It’s just messy. As far as I know it doesn’t cause cancer or birth defects, but you may as well treat it like it does.
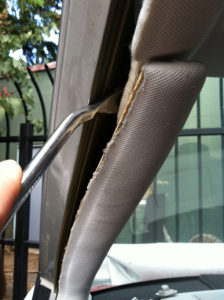
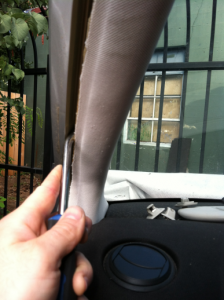
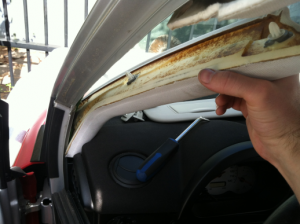
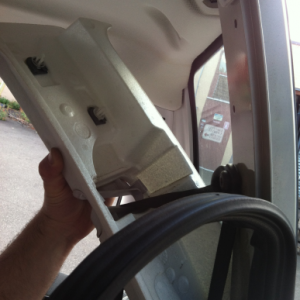
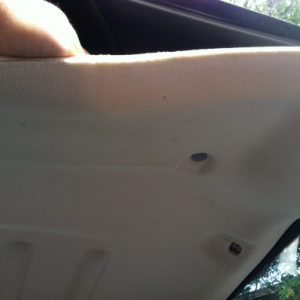
Remove the A-pillar trim. These trim pieces of rigid foam and white upholstery are another point of constant frustration for me. Many of them come loose, and when I “repair” them they often come loose again. They are held in place by three body clips and are wedged in between the top of the dash and the frame. The mode of failure is typically that the small plastic mounting brackets for the body clips come unglued from the foam trim piece. The shop that I work at, Hawthorne Auto Clinic, owns a Think and I have tried to repair the left A-pillar trim no fewer than 5 times. I believe it is currently holding at the time of this writing. I’ll write an entire separate post about that some other time.
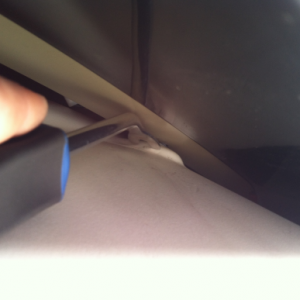
Anyway, use a body clip removal tool or some similar prying device at the locations shown. The bottom of the A-pillar trim piece needs to move aft and rotate out (and I believe the intent of the design is that the bottom body clip stay attached to the A-pillar structure), but it’s wedged so tightly that it just doesn’t come out cleanly. When re-installing, I have recently started to just remove that bottom blue body clip– I think it just complicates an already messy situation.
Also, even with perfectly clean hands your A-pillar trim is going to look a bit distressed from impressions of your fingers in the foam under the upholstery. I digress.
Remove the top section of the B-pillar trim. This is held in place with a few body clips as well. You can try to pry directly at the clips with a tool, but if you just pull evenly on the entire trim piece at the top the body clips usually come loose like they are supposed to without the glue failing.
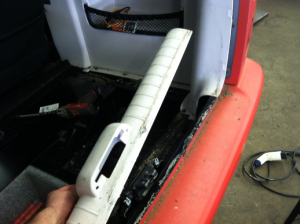
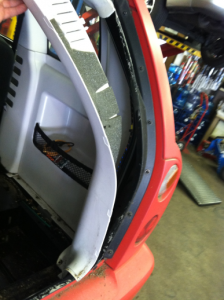
Remove the C-pillar trim. You first have to remove the trim piece at the bottom of the hatch; remove the 7(?) screws (Torx 20), and watch out for the sticky gray stuff. There are 2 more screws that secure the bottom of the C-pillar trim, and after that the trim piece is secured only by clips to the interior panel just forward of it. Pull the clips loose starting from the top, pulling mostly toward the center line of the car, but also trying gentle force down, up, forward and aft if some of the clips resist coming apart.
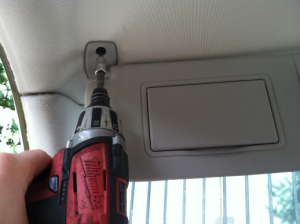
Going back to the front, remove the sun visor, secured by 2 screws (Torx 20, I think, but maybe 25). Remove the visor clip, secured by a single Torx 10 screw.
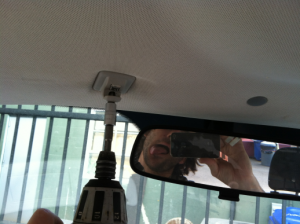
There is a single gray plastic fastener just above the center rear-view mirror. Pry it loose, and the front of the headliner should flop down and rest on the mirror.
Remove the cargo hooks above the rear windows, secure by a single Torx 20 screw.
Remove the 4 other gray plastic fasteners, one at the top of each B-pillar and two toward the aft end of the headliner.
The headliner will have to bend slightly concave down as you pull it out through the rear hatch.
Install in reverse order of removal.
